Blog Layout

How To Hang a Heavy Mirror on Drywall

August 14, 2023

Hanging Heavy Mirrors on Drywall Like a Pro


Ah, the allure of a beautifully crafted mirror – it can transform a space, add depth, and even make a room feel larger. But before you get lost in your own reflection, there's the small matter of hanging that heavy mirror on your drywall. Fear not, my home décor enthusiasts, because we're diving into the art of mirror hanging, ensuring your reflection game is strong and your drywall remains intact.


Tools and Supplies


Before you embark on this mirror-hanging journey, gather your tools and supplies like a seasoned explorer preparing for an adventure. You'll need:


Heavy-Duty Wall Anchors: These are your trusty sidekicks in ensuring your mirror stays put. Choose ones that are designed to handle the weight of your mirror.


Drill and Bits: A reliable drill is your best friend. Make sure you have the right drill bit size for your wall anchors.


Level: A level ensures that your mirror hangs straight, avoiding any "leaning tower of mirror" situations.


Pencil: A simple pencil mark helps you pinpoint the exact spot for your anchor holes.


Screws: The anchors come with screws, but it doesn't hurt to have a set on hand, just in case.


Step 2: Measure and Mark


Measure twice, hang once – that's the golden rule. Measure the height and width of your mirror and mark the desired spot on the wall with a pencil. Using a level, make sure your marks are perfectly aligned, ensuring a straight and balanced mirror.


Step 3: Choose the Right Anchors


Not all wall anchors are created equal, so make sure you select ones designed for heavy objects. Toggle bolts or molly bolts are great options. The packaging of the anchors usually indicates the weight they can support – aim for ones that comfortably exceed the weight of your mirror.


Step 4: Drill Pilot Holes


This is where your drill skills come into play. Use a drill bit that matches the size of your chosen wall anchors. Drill pilot holes at the pencil marks you made earlier. Make sure the holes are deep enough to accommodate the length of the wall anchors.


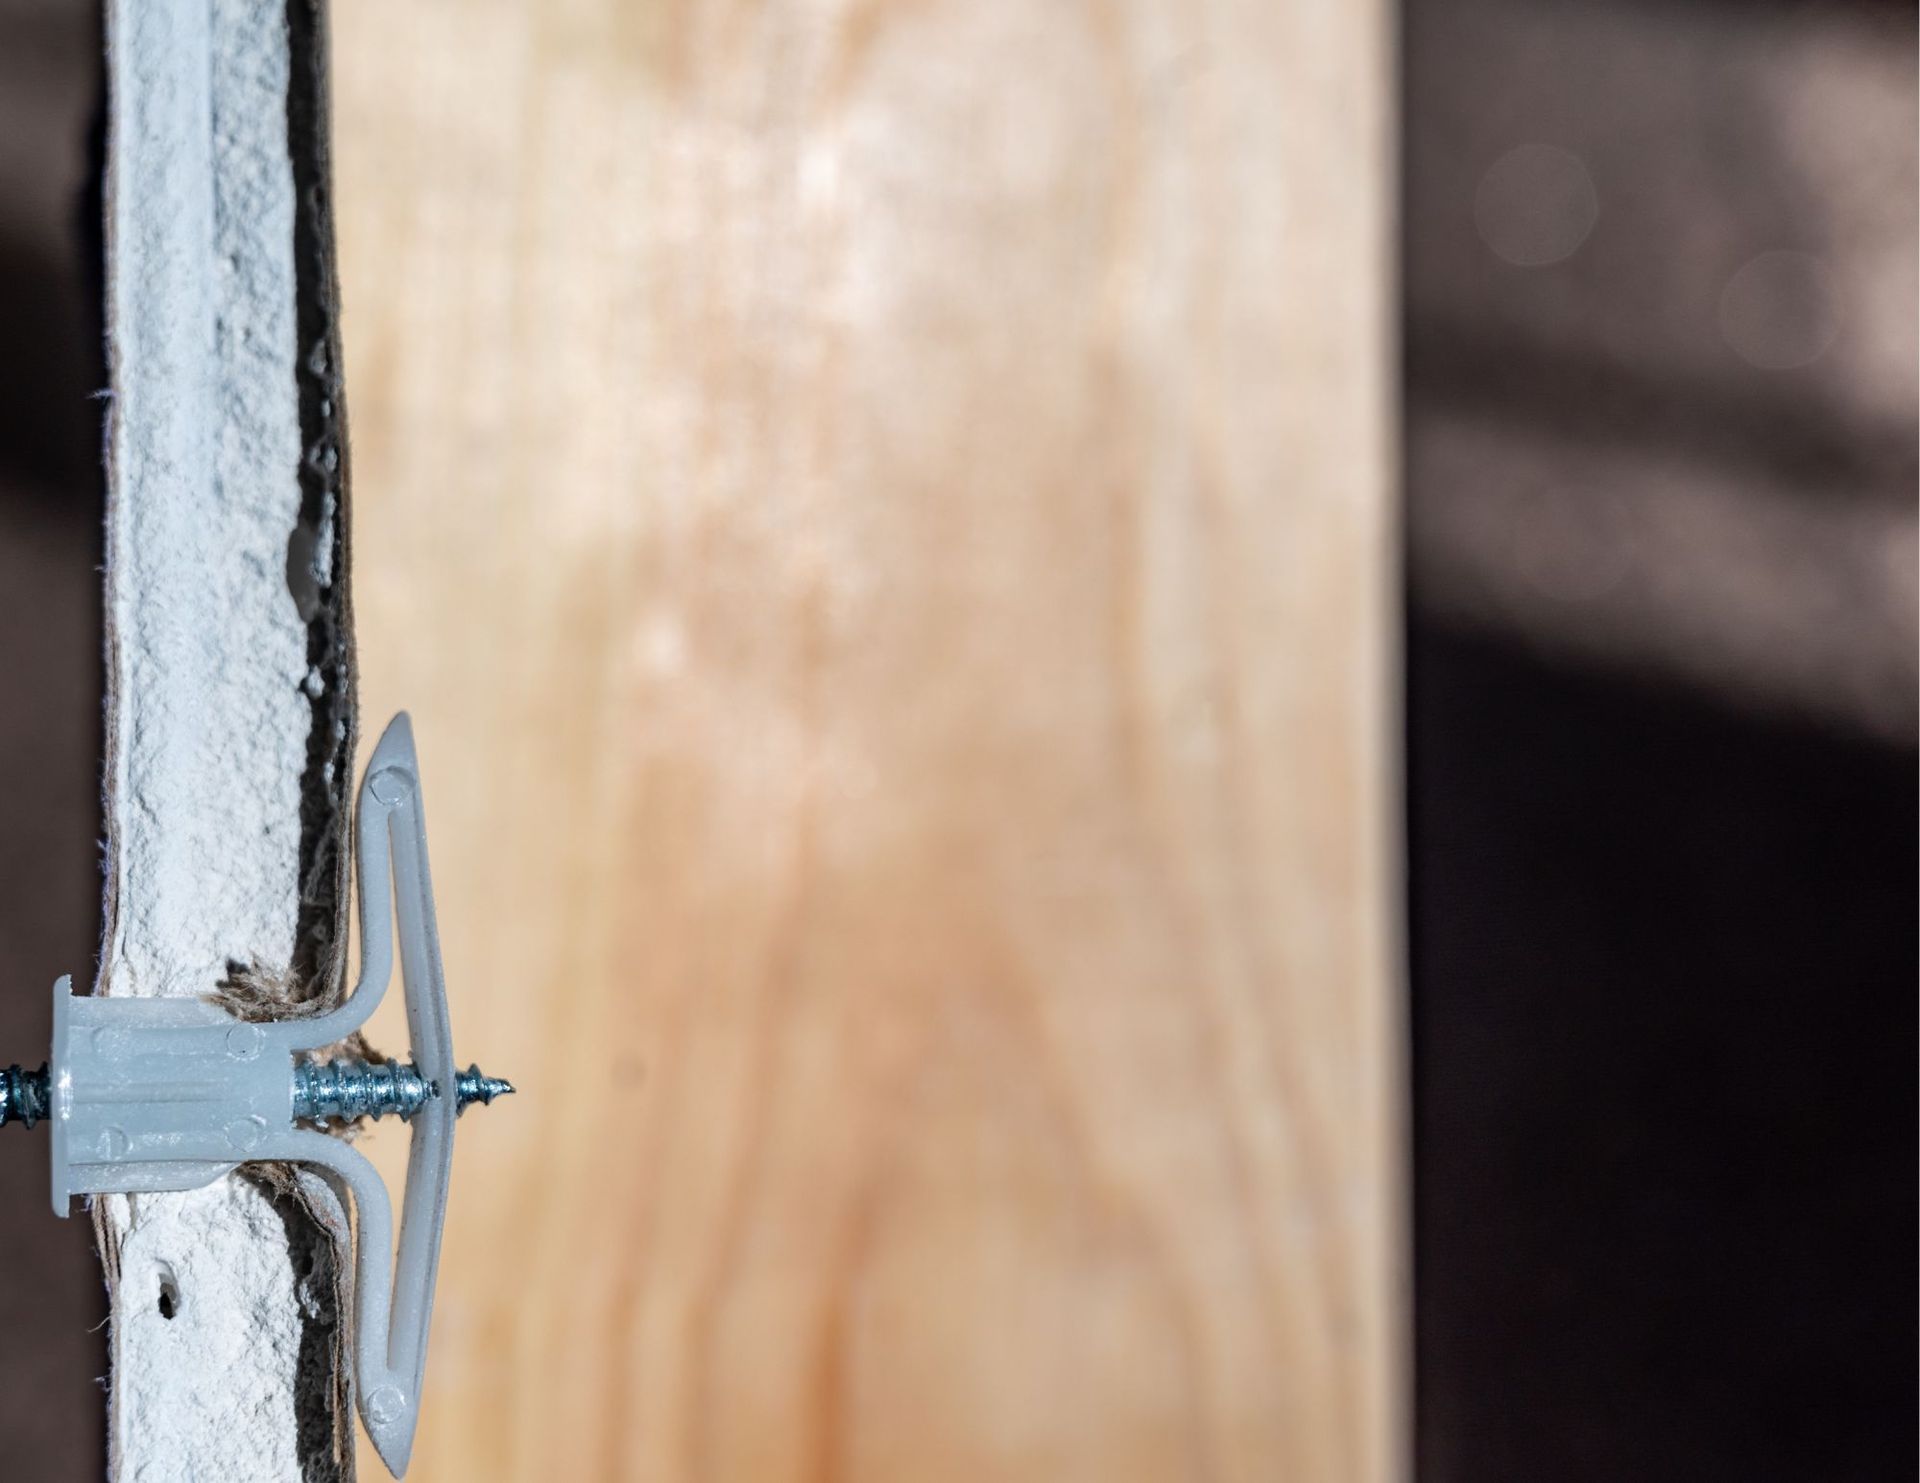
Step 5: Insert the Anchors


Gently tap or screw the wall anchors into the pilot holes. They should fit snugly but not be forced. If they're not going in smoothly, try a different spot or adjust the size of your pilot hole.


Step 6: Hang the Mirror


Hold your heavy mirror carefully, aligning its hanging brackets or hooks with the wall anchors. Depending on the type of mirror, you might need a helper for this step. Once everything is lined up, gently lower the mirror onto the wall anchors.

Step 7: Secure the Mirror

Now, it's time to secure the mirror in place. Insert screws through the mirror's hanging brackets or hooks and into the wall anchors. Use your drill to tighten the screws, but be careful not to over-tighten and risk damaging the mirror or the drywall.


Step 8: Give It a Final Check


Stand back and admire your handiwork. Use your level again to ensure the mirror is hanging straight and level. Give it a gentle nudge to make sure it's securely in place.


Step 9: Enjoy Your Reflection


Congratulations, you've successfully hung a heavy mirror on drywall like a seasoned DIY pro! Now, step back and bask in the satisfaction of a job well done. Your space has a new focal point, and you've managed to achieve it without causing any drywall disasters.


Remember, the key to successful mirror hanging is patience and precision. Take your time, follow the steps carefully, and before you know it, your heavy mirror will be gracing your wall with style and sophistication. Happy hanging!


Gently tap or screw the wall anchors into the pilot holes. They should fit snugly but not be forced. If they're not going in smoothly, try a different spot or adjust the size of your pilot hole.

If you're looking for
drywall contractors in Ottawa, give us a call!

You might also like

December 5, 2023
Drywall anchors, while essential for securely mounting objects, can become a nuisance when they need removal. Whether you're redesigning your space or altering wall fixtures, understanding how to remove drywall anchors efficiently without causing damage is crucial. In this comprehensive guide, we'll delve into several tried-and-tested methods to help you successfully remove drywall anchors with ease.  Gather the Necessary Tools Before you begin, assemble the following tools: Pliers: Needle-nose or regular pliers will be useful for most removal methods. Screwdriver or Drill: Depending on the type of anchor, you may need a screwdriver or drill. Utility Knife: Helpful for cutting and exposing certain types of anchors. Putty Knife: Used to patch holes after anchor removal. Different Methods for Removing Drywall Anchors 1. Screw Removal Method: For Plastic Ribbed Anchors: Loosen the Screw: If the anchor has a visible screw head, use a screwdriver to unscrew it until it's flush with the anchor. Grip and Pull: Using pliers, grip the screw head and gently pull it out. The anchor should slide out with the screw. For Winged Plastic Anchors: Remove the Screw: Unscrew the fastener until it's flush with the wall. Pull Out the Anchor: Use pliers to grip and carefully wiggle the wings of the anchor while pulling outward. Apply gradual pressure to avoid damaging the drywall. 2. Toggle Bolt Removal: Unscrewing Method: Toggle bolts often have a screw visible on the front. Unscrew it completely until the toggle falls behind the wall. Then, remove the bolt and pull the toggle out gently using pliers. 3. Push or Hammer-In Anchors: Prying Method: Use a putty knife or flathead screwdriver to gently pry the anchor away from the wall. Apply steady pressure to prevent damage. 4. Expansion Anchors: Drilling Method: If the anchor doesn’t have a visible screw, carefully drill into the center of the anchor using a drill with a bit slightly smaller than the anchor size. Drill until the head breaks off, allowing the anchor to fall into the wall cavity. Tips for Removing Drywall Anchors Safely Apply Gradual Pressure: Avoid using excessive force as it might damage the drywall. Repair Holes: After removing the anchor, patch the hole with spackling compound using a putty knife and sand it down for a smooth finish. Identify Anchor Type: Different types of anchors require different removal methods. Assess the anchor type before attempting removal. Protective Gear: Use safety goggles to protect your eyes from debris during the removal process. Situational Considerations Large Anchor Removal: For larger or stubborn anchors, consider using a crowbar or claw hammer to gently pry them out. Exercise caution to avoid damaging the wall. Multiple Anchors in Close Proximity: If you're dealing with several anchors close together, take care to avoid damaging the surrounding drywall while removing them. Conclusion Removing drywall anchors doesn’t have to be a daunting task. By employing the appropriate tools and techniques, you can effectively remove anchors without causing unnecessary damage to your walls. Understanding the type of anchor you're dealing with and utilizing the suitable removal method are key to successful extraction. Remember to work patiently and gradually, applying just enough force to remove the anchor without harming the drywall. Once the anchors are removed, patching the holes properly ensures a seamless finish, ready for a fresh coat of paint or new wall fixtures. By following these step-by-step removal methods and considering the situational tips provided, you can confidently tackle the task of removing drywall anchors, allowing you to modify or redesign your space hassle-free. If you're looking for an expert Ottawa drywall contractor, give us a call today for a free quote.
December 5, 2023
This is a subtitle for your new post
December 5, 2023
Looking to do your own drywall work? Here's how to cut drywall properly
More Posts

Book a Service Today

Share by: